Materials
All of our printers use 1.75mm filament.
We store most of our filament in the Rockstar fridge. The compressor on the fridge is disabled and there are a ton of silica packets in there, so it helps make for a dry, dust-free environment. We have mostly PLA, some ABS, a little PETG, and maybe one or two spools of other specialty filamnt (TPU, Carbon Fiber, etc). Filament in the fridge is pretty much up for grabs unless someone's name is on it. As with all consumables in the space, don't be a jerk – if you use a ton of filament, please help replace some.
Software
- Our recommended software. It is open source and can be used with all four of our current FDM printers.
- After you click the link above, you can find the OrcaSlicer download for your OS at the bottom of the page under "Assets."
- Be sure to download OrcaSlicer ONLY from this github page, which is their official source. Avoid "-orcaslicer.net-", "-orcaslicer.co-" and "-orca-slicer.com-" as these are unofficial and potentially malicious.
Printers
We've mostly standardized on Creality printers – this isn't by any policy, but Creality's printers are generally pretty decent, inexpensive compared to other brands, and very hackable.
- Print Station 1: Bambu P1S (with AMS)
- Print Station 2: Creality Ender 5 Pro (with BLTouch)
- Print Station 3: Creality Ender 5 S1 (with Sonic Pad)
- Print Station 4: Creality Ender 3 Pro
We also have several other printers that need some amount of T.L.C. before they're usable. We may be willing to let these go to a good home if anyone were to ask nicely enough.
General How-To
Drying Filament
It's important to make sure your filament is dry before printing, as filament that has absorbed moisture can be very brittle and will print poorly. There is a filament dryer at the space and here are some times and temperatures to use for various filament materials commonly used:
| Material | Temperature | Hours |
|---|---|---|
| ABS | 60°C (140°F) | 3 |
| ASA | 80°C (175°F) | 4 |
| PETG | 55°C (130°F) | 6 |
| PLA | 45°C (115°F) | 6 |
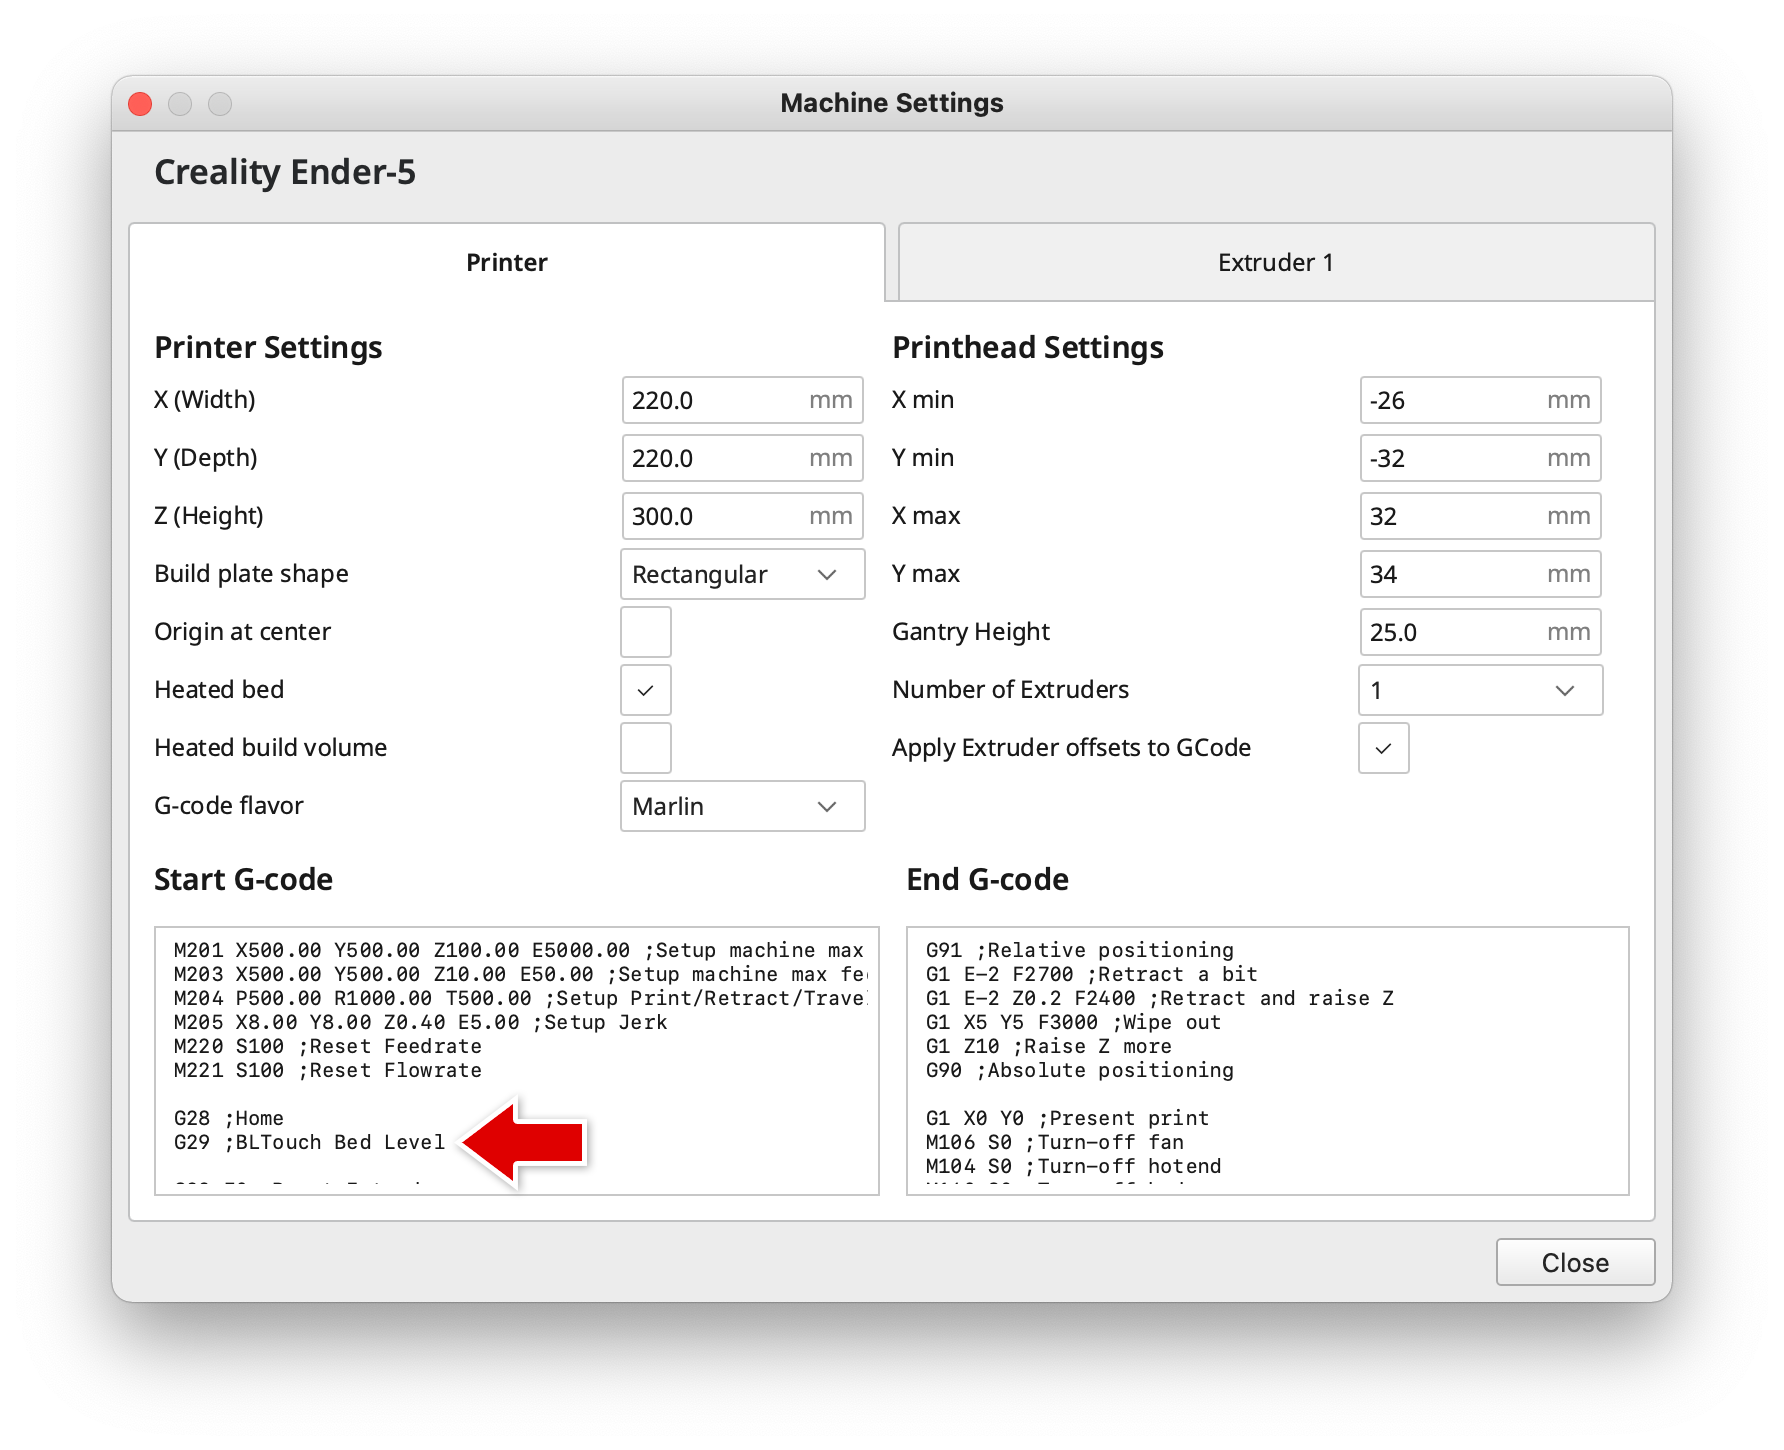
Set up BLTouch in Cura
Our Ender 5 has a BLTouch bed probe installed which needs to be enabled in the printer profile in Cura. After adding the Ender 5 printer, open the machine settings. After the G28 command, add a G29 to enable the bed probe at the start of each print.
Resources
Guides
- Bed Leveling Guide
- 3D Printer Troubleshooting Guide - MatterHackers
- Print Quality Troubleshooting Guide - Simplify3d
- Ultimate 3D Printing Troubleshooting Guide - 3DSourced
3D Models
Printer-Specific Usage Guides
Print Station 1: Bambu P1S
Workflow for Bambu P1S
- Load desired colors / materials into AMS as shown in the video below. Note which slot you put each color in; they are numbered 1-4 from left to right.
How To Load Filament Into AMS:
In Orcaslicer, select or set up a printer profile for the Bambu P1S. If you're at Root Access we recommend using PC Workstation 1 where Orcaslicer is already installed and profiles are set up for all four FDM printers.
Configure filament in Orcaslicer. Click the "+" icon to add another filament spool. The number displayed next to each spool corresponds with the slot number in the Bambu Lab AMS (spool holder). You can change the color icon for each spool in orcaslicer to something closer to the actual color loaded in the AMS to help you keep track of which parts of your print will be which color.
Configure print settings such as infill, wall count, adhesion, and support.
Add your model by clicking the icon shown in the figure below.
Select your model by left clicking it.
Click the icon shown below to begin painting your model.